What is a render, and how is it different from the 3D view?
Rendering means turning a scene into a realistic image, with light, materials and shadows. In architecture this is usually done in separate programs: a material is assigned to every surface, lights are placed one by one, and a good result takes effort.
Nodaform’s 3D view is simple and drawing-like. Walls, doors, windows and furniture appear as solid-coloured blocks. That’s enough to understand the layout, but it doesn’t answer the question “What will this room look like when it’s lived in?” AI render fills that gap: it takes the shot from the 3D view and turns it into a realistic image by adding materials, textures and light.
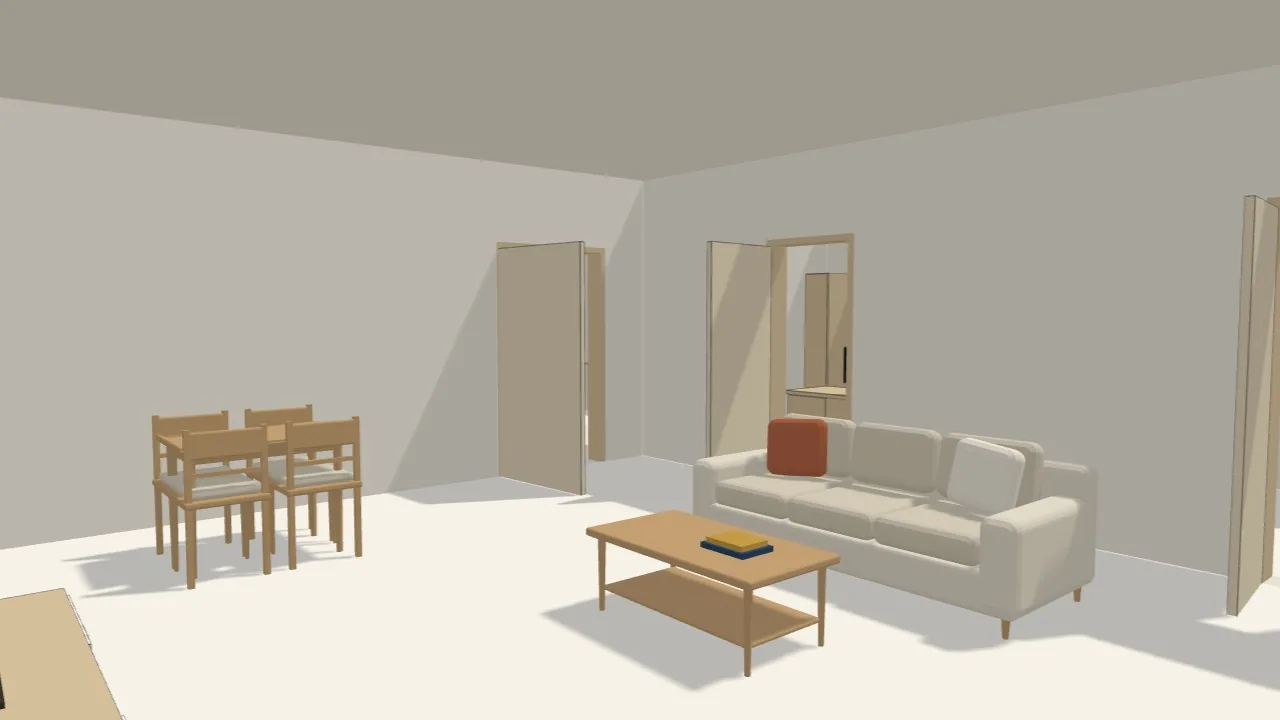
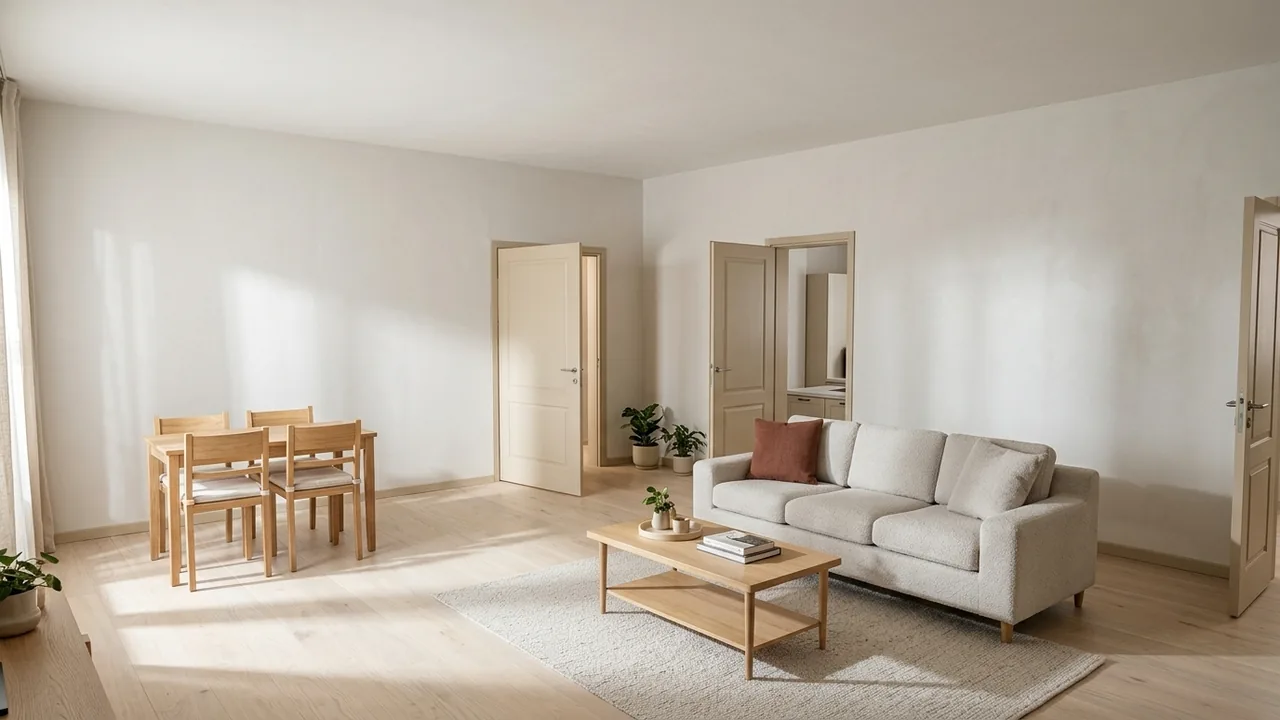 3D modelRender
What does a render take from the plan?
A render doesn’t work from a screenshot alone. Along with the image, the AI also receives a description of the scene: the room’s name, the furniture in it, and the number of windows and doors. That’s why a worktop that looks like a plain box in 3D is drawn as a worktop in the render, and a wardrobe as a wardrobe.
The description also sets limits. The positions of walls, doors, windows and furniture are kept, and the AI is asked not to add items that aren’t on the list. Neighbouring rooms are described as visible only through the door, so the whole kitchen doesn’t spill into the living room render.
The upshot is simple: a good render starts with a good plan. Give rooms the right names and place the furniture. If you haven’t put a bed in the bedroom, don’t expect one in the render.
Interior render, step by step
- Prepare the plan. Draw the walls, doors and windows; name the rooms and place the furniture.
- Switch to Render. Open Render from the 2D plan · 3D view · Render switch at the top of the editor, then choose Interior from the tabs on the left.
- Choose the room. The camera is placed at an empty spot in the room, at eye level. Use Another angle to look from another corner or from the door; drag to adjust the view, and use W A S D or the arrow keys to move. Lens options are Ultra-wide, Wide angle and Normal.
- Choose the frame. 16:9, 4:3, 1:1 or 3:4. The outline in the 3D view shows what will be in the image.
- Choose the style and lighting. Style: Modern, Scandinavian, Classic, Industrial, Japandi or Farmhouse. Lighting: Daylight, Sunset or Evening.
- Add a request if you like. A short note on colours, materials, fabrics and accessories (up to 300 characters).
- Generate and download. Download the ones you like. Renders from this session stay in the panel as thumbnails; click one to open it again. They’re deleted when you close the page.
While exploring in the Interior tab of the 3D view, you can also jump to the same spot with the Render this room button.
Where to put the camera
A photographer usually shoots a room from a corner or the doorway, looking along its longest dimension. The same goes for render: it can only enhance what it sees in the frame.
From a corner, into the depth of the room. Two walls, the window and the furniture are visible together.
Too close to the wall. Most of the frame is a flat wall; the render has nothing left to show.
- Look from a corner or the door. Two walls and the depth of the room are visible together; the room doesn’t look smaller than it is.
- Don’t get too close to the wall. If half the frame is a flat wall, there’s less material and light for the render to work with.
- Don’t stand inside furniture. If the camera ends up inside a cabinet or sofa, the shot breaks. Nodaform starts the camera on the room’s empty floor; keep this in mind when moving it yourself.
- Get the window in the frame. Light comes in through the window; a shot with a window in it usually looks livelier.
- Pick the lens to suit the room. In narrow rooms a wide angle helps; in a large living room the Normal lens gives less distortion at the edges.
How to write your request
The request field is for adding your own touch on top of the style and lighting. You can change colours, materials, fabrics and accessories; the positions of walls, doors, windows and furniture don’t change.
Requests that work:
- “Navy bedspread, light oak parquet floor, linen curtains”
- “Dark green velvet sofa, a large abstract painting on the wall”
- “Matte white kitchen cabinets, dark stone worktop”
Requests that don’t: “Add a second window to the room” or “Remove the wall between the kitchen and living room”. The number of windows and the walls come from the plan; if you want to move something, change it in the plan first, then render again.
Keep it short and concrete, and separate multiple requests with commas. Trying the same frame a few times with different styles and lighting often gives better results than writing one long request.
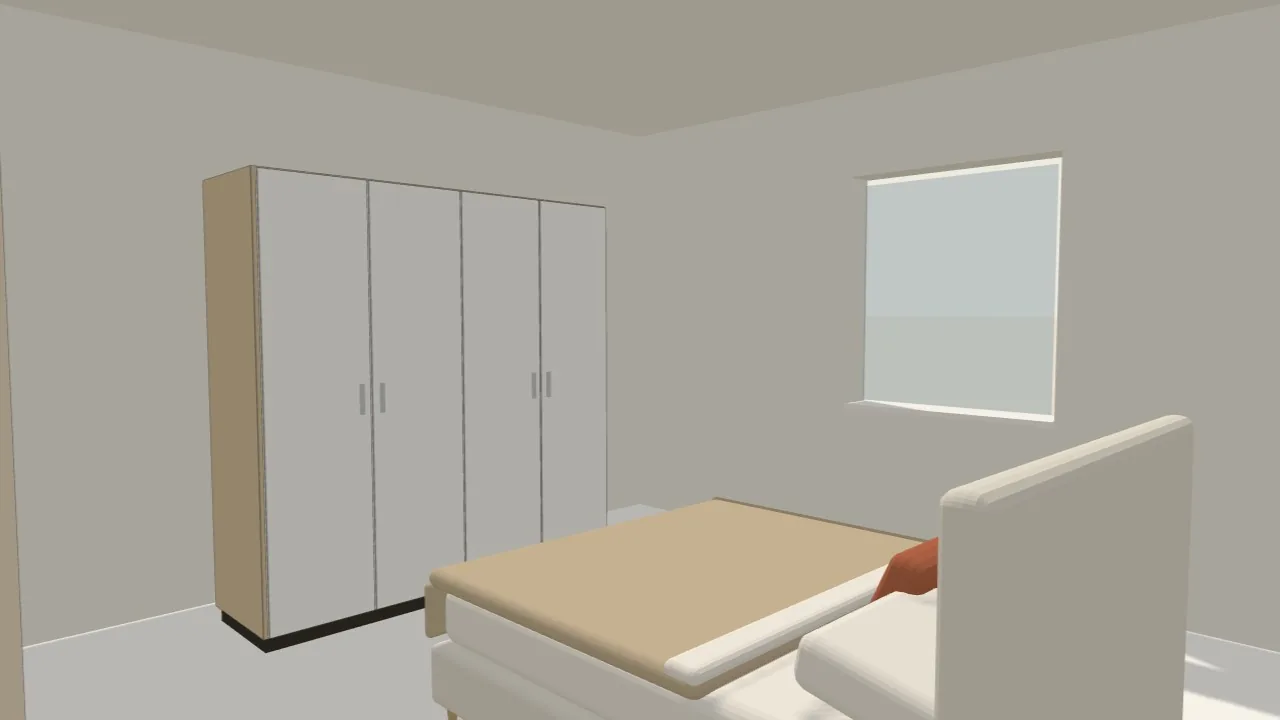
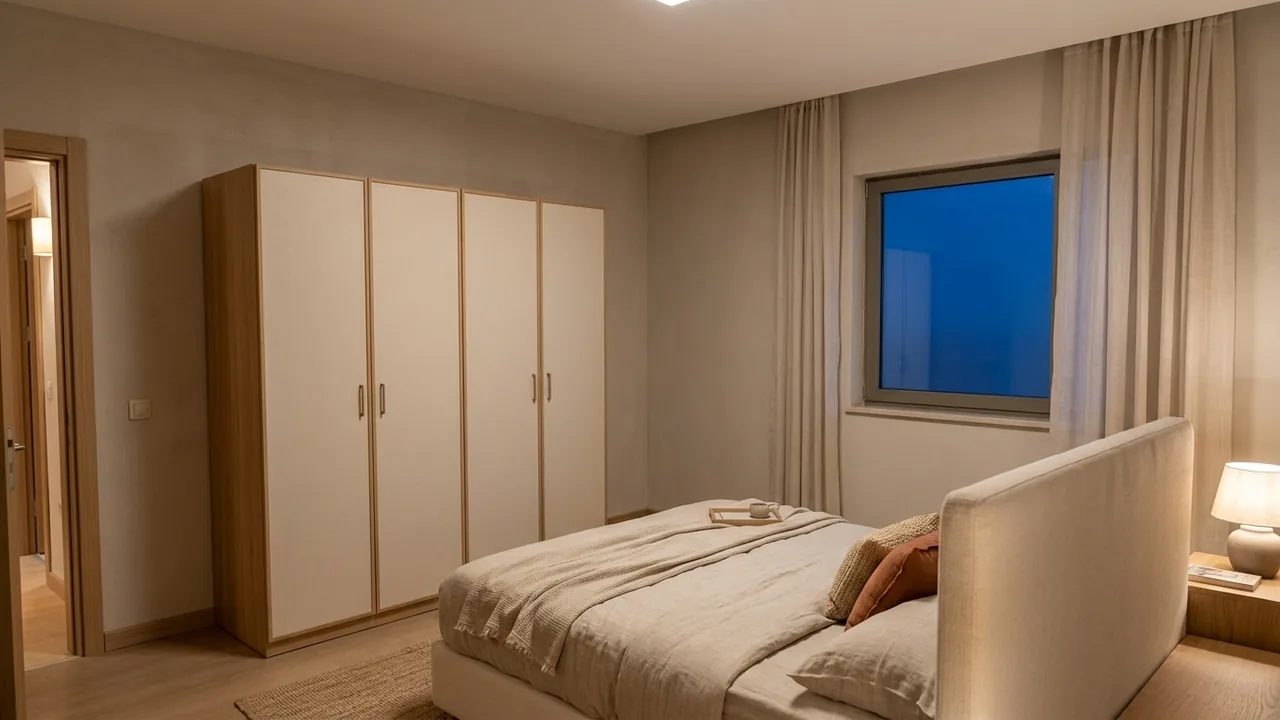 3D modelRender
Exterior: the whole flat in one shot
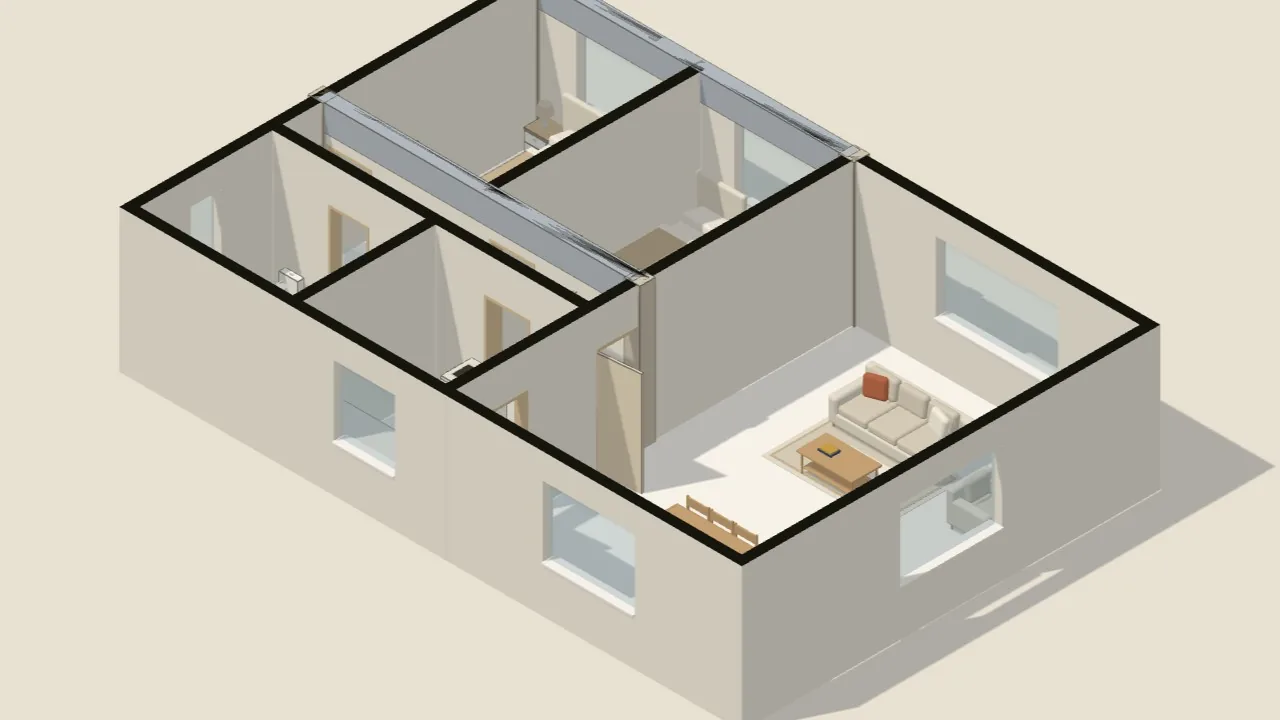
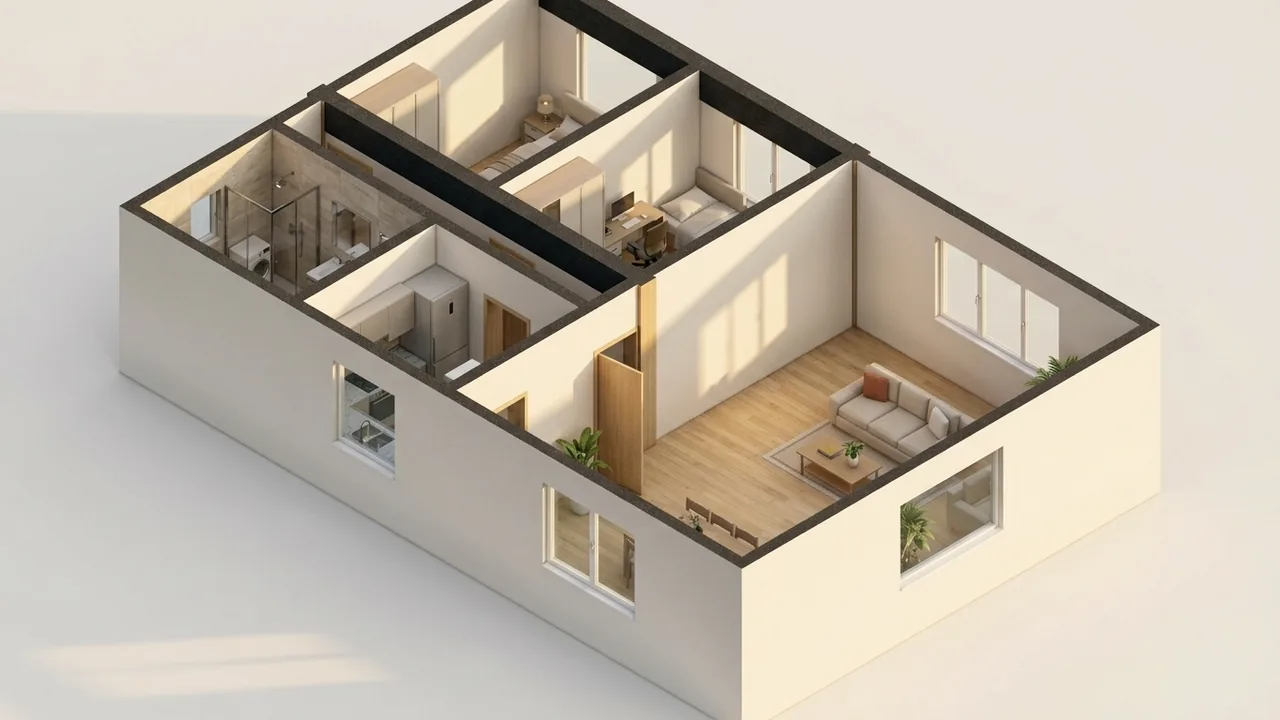
In Render’s Exterior tab, the plan looks like a scale model with the roof off. All the rooms and their furniture are described to the render, so it comes with kitchen cabinets and bathroom tiles. Choose the direction from the cube at the top right and drag to rotate; switch between Isometric and Perspective views below the cube. The Fit to frame button fits the building into the frame.
 3D modelRender
This view is good for showing the whole layout in one image: in a presentation, in a listing, or when talking with the people you’re planning the home with. For now, the exterior is drawn as a roofless model; there are no façades or roof.
What a render is not
A render is a visual suggestion, not a measured drawing. Materials, colours and lighting are the AI’s interpretation; two renders from the same shot won’t come out exactly the same. Use the plan for dimensions, areas and layout.
The AI can make mistakes too: it may leave out a window or change the shape of an item. If you don’t like the result, change the angle or your request and try again. If no image can be generated, it doesn’t count toward your allowance.
Pro includes 20 renders a month and Ultimate 50; 2K renders are on Ultimate and count as 2. When your allowance runs out, you can buy one-time render credits. Details are on the Render page.
Quick checklist for a good render
- Name the rooms and place the furniture
- Put the camera in a corner or the doorway
- Don’t get too close to walls and furniture
- Choose the frame for where the image will be used: landscape for presentations, portrait for phones
- Keep your request short and concrete
- Try the same frame with a few styles and lighting options
- Download the ones you like; they’re deleted when you close the page
A render is a visual suggestion; it does not replace measured drawings, a permit or construction drawings. Construction requires approval from a licensed architect and engineer.